 Image by OpenClipart-Vectors from Pixabay Image by OpenClipart-Vectors from Pixabay I have now been painting for about 20 years, more seriously for about 10 of these. I have tried various subjects, methods, techniques and mediums, and I continue to explore all the time. There are some mediums and techniques I prefer, and some I don’t really care for.
One of those is plein air painting. Now in case you don’t know what that is, plein air painting is simply painting outside rather than in a studio. It was more or less invented by the impressionists in France, hence the French term “plein air”, which strangely enough francophone painters around here call “peindre sur le motif”! Go figure! Anyway, proponents of “plein air” painting tout its incomparable virtues, stating there is no substitute for seeing the “real colors” and the “real light”, and swear that no photo can capture these for the artist to paint anything decent from. That has not been my experience. Give me a great photo from which I can paint at my leisure in a nice comfy studio any day! As you can imagine, painting out of doors comes with its share of irksomeness. You have to:
If it sounds like perhaps I am not a fan, you could be right! I know a lot of people who simply adore plein air painting, and I figure they must know something I don’t and I really have to try it again (I have tried it just outside my house, and other than the onlookers I had to deal with all the above). So I planned to do it this week, by going to paint at the new location of our local lavender farm, which I visited last week with the local group of artists I recently joined. The group has a fantastic arrangement with the owners, allowing us to go paint on location any time and to even sell a few paintings on the spot. And it is a beautiful spot! So with step 1 taken care of, and step 2 pretty much assured, I started thinking of step 3 and realised that I don’t really have the right equipment! At home on the deck, I can sit and put my stuff on the outdoor table, but out in the field, I would need a standing portable easel, strong enough to also hold my paints, brushes, and water. And I don't want to be carrying too much stuff! So I did what I like best, started looking online for a second-hand plein air easel. Thankfully it didn’t take long and I am now the proud owner of a very nice, good quality French easel (that really is what it is called!). I only have to figure out how to get my paints and stuff organised in it and I will be good to go! Literally! Today is a holiday in Quebec and a beautiful day, and even though the crowds at the lavender place may be a bit more than I want to face on a first outing, I will be doing 3 though 14 later today. Wish me luck!
0 Comments
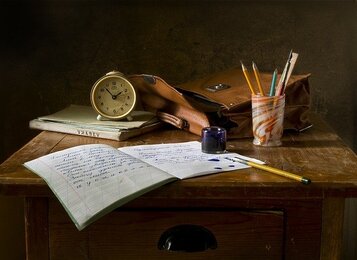 Image by Лариса Мозговая from Pixabay Image by Лариса Мозговая from Pixabay When I started blogging, I thought it would be easy. I have always liked writing, in fact, somewhere in all my stuff, I still have the skeleton of the next great novel that will never be finished, especially now I have found I can paint!
Back when I was teaching, I loved to make up assignments that were as realistic as I could make them, in an effort to prepare my students for the “real world”. Some of them may be reading this and remember my “Happy Valley Summer Camp” semester project, or the fun “cases” I would make up for final exams! Few will know that I tried writing a “novel” styled book to try to make the subject I was teaching a little less dry. That turned out to be impossible, so I wrote a standard textbook instead. Anyhoo… As I was saying, I thought it would be easy. And I was right, the writing part is! But the hard part? Finding a new topic every week!! You may wonder why I even bother. I have no idea of how many people read this, but I made a commitment so here I am, regardless of readership! I hope people are reading and enjoying it, but in some respects, it doesn’t really matter. I started blogging because the online marketing geniuses said it was a good way to “get yourself out there”. More people will see that you exist and may start following you, they said. And although there are some technical reasons why this is still true even if no one reads it, it turns out the blog writing has quite unexpectedly been good for me. It has forced me to examine the whys and the hows I do things, and to stop at least once a week and take time to reflect on the motivation for what I do and why I do it the way I do. It has forced me to research some subjects about which I thought I knew a lot more than I actually did! It has made me appreciate what I have and how fortunate I am, and it has given me a forum to occasionally vent frustrations. And hopefully, it has allowed some of my readers to learn something about me and about art, and especially watercolors, by getting a glimpse of the work that goes on behind the scenes. I realize this is beginning to sound like a farewell speech, but rest assured, it isn’t. I will be back next week, with a new topic! If you have something you would like to hear me go on about, please leave a comment. Hey, leave a comment just to let me know you are out there! And if you know anyone who would like my ravings, share this blog with them! Thanks for reading! 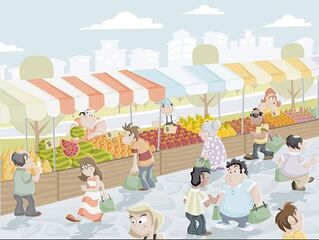 You will surely agree with me that it has been a tough year. I have spoken of this before, and I am very grateful to have had very few close friends or family members suffer from Covid-19. And to those who have suffered from the disease, and their families, may I extend my deepest condolences. Everyone had been affected to a certain extent, and I don’t know of anyone who isn’t glad to see the lights at the end of that tunnel shining brighter every day.
One of those lights, for me, is the return of in-person fairs and markets. Within the next few weeks, I will be setting up a regular display at our local farmers’ market, I will finally be doing a weekend art fair that got canceled last year, and I will also be doing some plein air painting and displaying work in a public area by the lake in a neighboring town. Except for the lake display, I will need to bring all of my equipment to set up a booth, which means that for the past few weeks (actually I started this winter for the weekend show), I have been planning and purchasing things for my set-up. I also collected a good number of tips and tricks for market/fair booths from videos I found on YouTube. I already have a 10x10 pop-up canopy, which I had purchased 2 years ago for a local 1-day show. I have a small folding table, but that is not enough, so I started looking for folding tables, the type that folds in two so they can fit in my car. If you have been following me at all, you know I am notoriously thrifty, so of course, I looked for used first! I thought I had found one, but when I went to pick it up, the “few small cracks” the seller had mentioned turned out to be jagged missing chunks along 2 edges, as well as menacing cracks that forewarned of the upcoming “calving” of another big chunk of the table’s edge. No wonder he did not include pictures of that side in his ad! I reneged on my promise to purchase, even though he had brought down the price to $25 from his asking $40. It is still available (still without pictures of the cracked parts) on Facebook Marketplace if you are interested….. I did buy a smaller, unadvertised square folding table from him for the same price, and I have since found, though have not yet picked up, a “used, like new” table from a hopefully more forthcoming seller. I have also bought two “event style” tablecloths, those with straight floor-length edges that hide the table legs. I got them in black, figuring that would look classy. I hope I am right. I also got a smaller square black and white checkered tablecloth to jazz things up a bit. I already own a revolving card rack as well as two folding table easels, and I had purchased earlier this year a table-top print rack for holding unframed but matted paintings (they are in individual clear bags) and two folding floor easels for the two framed pieces I plan to bring each week to the market. Last year, I got a Square reader to be able to take credit card payments at the weekend show, but never got the chance to use it! So I got it out and tested it again, adding my new work to the app’s inventory so it would be available for sale. I bought a paper sales book and had some stickers made to personalize the invoices. As I don’t want to carry too many framed pieces because of the glass, and as WiFi will not be available on-site, I made a slide show of some of my paintings so potential customers could see some of the other items I have available. I also created an offline Sign-Up page for people to sign up for my newsletter. I made some postcard-sized prints to give out to anyone who signs up, and I designed and ordered a banner to identify my booth. I received it yesterday and it looks fabulous! I painted a few more ACEOs (trading card-sized paintings) and ordered some perfectly sized pre-cut mats to present them in. I have matted a few and they look fabulous! I still have to decide if I will mat them all or not …. I still have a shrinking list of things to do: make a few signs for the tables, price my matted works, find a way to secure my electronics, see if it all fits in my car.... and I am planning a practice set-up this weekend, as soon as I have my new-to-me table! Although you can tell I am enjoying all these preparations, which I am keeping track of with my trusted assistant “Airtable”, I hope that people will visit my exhibits and find something they want to take home! By all means, if you are in the vicinity of Ste-Catherine-de-Hatley, do drop by and say hi! I will be posting specific dates and times for this and other events on my Facebook page, as well as in my weekly newsletter, which you can sign up for here. So, as you can see, it takes a lot of time and effort, not to mention expense, to set up those booths that you see at Art Fairs. The next time you walk by one, why not stop and have a chat with the artist. Even if you don’t buy anything, they will appreciate the visit! 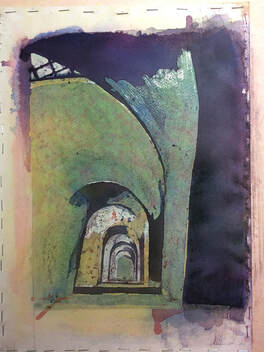 Watercolor pouring work in progress Watercolor pouring work in progress A few weeks ago, I got a request from one of my cousins to paint a watercolor from a photograph he had taken. It is a beautiful photo, (of course!) but it has a glowing sun peeking through trees and giving the whole scene a special look. My first reaction was “Wow!”, followed immediately by “Hmmmm, how can I do that in watercolor?” and, seconds later, “CAN I do that in watercolor?”
I posted part of the photo and asked the question in one of my global networking groups on Facebook. Several people reassured me it could be done, but did not elaborate on how! Some had good suggestions, but one in particular recommended I look up the artist Roland Roycraft for tips and techniques. This artist is no longer living so there were unfortunately no Youtube videos to go to, but he did write a few books on the subject of painting light, so I bought one, used of course! And so began my journey into the world of poured watercolor. I had never heard of poured watercolors, so I was very intrigued. I found a few very useful demos on Youtube, and in particular, a multi-part series by an artist called Linda Smith Latimer that covered everything you need to know, including how to make a special board to which to attach your watercolor paper. I had to order the materials to make them, and I am glad I did! I will be making several and even if I don’t pursue pouring watercolors, I will continue to use the boards! One of the things I did not like about her methods is the amount of paint she wastes. She really takes the “pouring” part seriously, and pours most of the paint down the sink! In addition to being bad for the environment, that can be costly!! And if you have been reading me for a while, you know that I am notoriously thrifty! So I modified her technique and rather than pour the paint from a saucer like she does, I use a set of 3 squeeze bottles that I got at the dollar store. Oh, that’s right, I never did explain how the technique works! Here goes! First, you make your drawing on the watercolor paper, either before or after it has been “stretched” and attached to the painting board (like Linda Smith Latimer, I use staples). Well, actually, before that you need to decide what you will be painting. This technique works best for large shapes and images that have strong value contrasts (some very light areas, some medium, and some very dark). Then, you decide (or observe if you are using a photograph) which areas are the very lightest. If you want those to be pure white, you cover them with masking fluid, which is a liquid rubber-like substance that shields the paper from the paint (this will later be removed to reveal the white area that was masked). Then you wet the paper all over and start pouring the paint. The strange thing here is that you use only three colors: a yellow, a blue, and a red! I imagine that you can do what you want but, from my research, that seems to be how pouring works! Of course, if you remember your primary school “color theory” lessons, you know that all colors can be made from these 3 primaries. So that is where the fun begins, trying to mix the colors while pouring. Roland Roycraft says to pour each color individually and let it dry, but Linda pours each in turn while everything is still wet. I have combined the two techniques in my experimentation so far. I apply small quantities of the required colors in spots then tilt the board this way and that to mix them. Once the paper is dry again, you then proceed to mask the next lightest areas of the painting. Once the masking fluid is dry, you can then pour the next layer of color. You may try to apply the colors so that they match the objects in your painting, but the main thing to match is value (lightness or darkness). Once this layer is dry, you apply masking fluid to the next lightest parts of the painting and repeat the mask, pour routine as many times as is needed to get the darkest parts of the painting dark enough. Once it is all dry again, you remove the masking fluid, which by now covers most of the painting, and reveal what you hope are the medium and light areas in the right places! It is a bit stressful, especially as the masking fluid sometimes rips the surface of the painting, which you do not want, as the damaged paper can not easily be repainted! You can then retouch areas that you want darker, and if necessary soften hard edges left by the masking process. It is a very interesting technique for me, because part of the result is based on luck, and part is based on skill and precision. One could think that because paintbrushes are only used at the end and only if necessary, this is easier than painting! After all, I am just pouring (or squeezing in my case) the paint! The painting paints itself! But applying the masking fluid has to be done carefully and precisely, and the paints have to be applied in the right spots, which both appeal to my need for control, but the mixing of the paint is partly due to luck, which I find feeds my need to paint in a looser style. And I love the results! I may just have found the perfect technique for me! So thank you to my cousin whose request pushed me to explore something new, thank you to the people who suggested I look up Roland Roycraft, and thank you to Linda Smith Latimer for sharing her knowledge on Youtube! |
AuthorMy name is Claire Bureau. Archives
March 2023
Categories
All
|
 RSS Feed
